


3D Printed Parts & Decor
Browse 3D printed enclosures, stands, mounts, and custom decor — printed by Maisonup in premium PLA for functional and aesthetic use.

Electronic Components, Microcontrollers & Sensor Modules
Shop microcontrollers, sensors, jumper wires, breadboards, displays, relays, LEDs, resistors, connectors and DIY electronics parts for projects, prototyping and learning.
Featured Décor
-
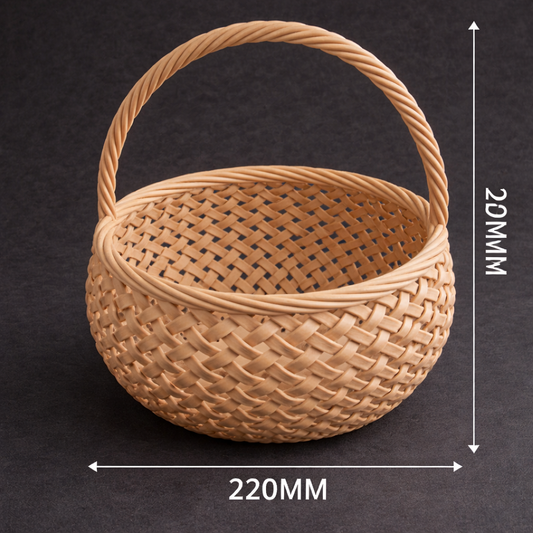
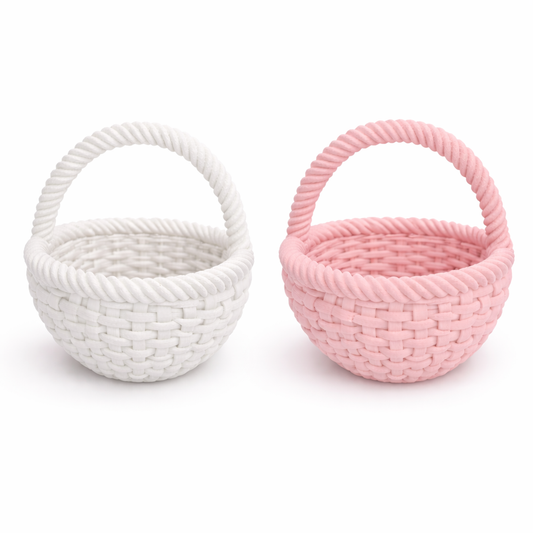
Traditional Pooja Basket with Handle – Temple & Festive Use
Regular price From Rs. 299.00Regular priceRs. 599.00Sale price From Rs. 299.00Traditional Pooja Basket with Handle – Temple & Festive Use
Regular price From Rs. 299.00Regular priceRs. 599.00Sale price From Rs. 299.00Traditional Pooja Basket with Handle – Temple & Festive Use
Regular price From Rs. 299.00Regular priceRs. 599.00Sale price From Rs. 299.00Sale -
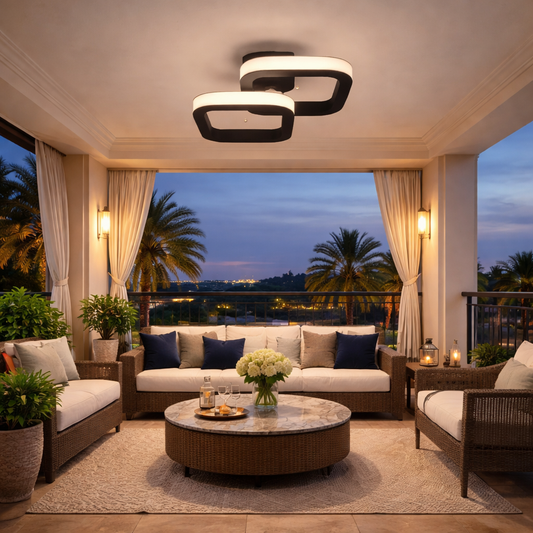
Modern LED Ceiling Light – Dual Square Black Ceiling Lamp for Living Room, Bedroom & Hall
Regular price Rs. 2,499.00Regular priceRs. 4,999.00Sale price Rs. 2,499.00Sale -
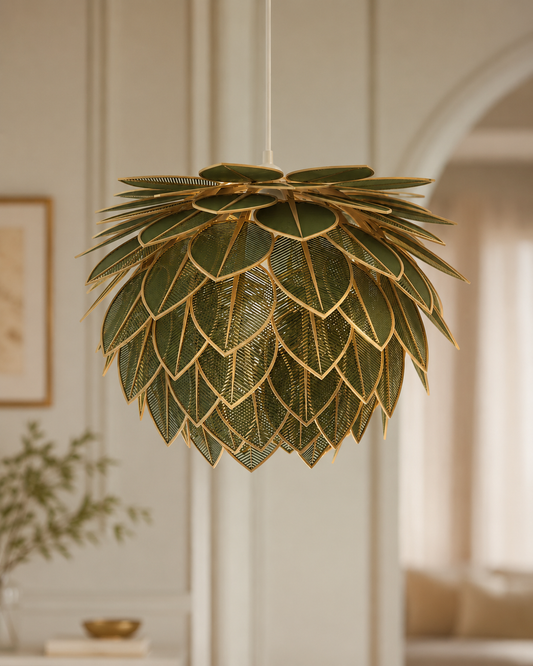
Leaf Design Ceiling Pendant Lamp for Living Room & Dining Room
Regular price Rs. 4,999.00Regular priceRs. 9,999.00Sale price Rs. 4,999.00Leaf Design Ceiling Pendant Lamp for Living Room & Dining Room
Regular price Rs. 4,999.00Regular priceRs. 9,999.00Sale price Rs. 4,999.00Leaf Design Ceiling Pendant Lamp for Living Room & Dining Room
Regular price Rs. 4,999.00Regular priceRs. 9,999.00Sale price Rs. 4,999.00Sale -
BloomCarry Floral Handheld Vase
Regular price Rs. 799.00Regular priceRs. 1,299.00Sale price Rs. 799.00BloomCarry Floral Handheld Vase
Regular price Rs. 799.00Regular priceRs. 1,299.00Sale price Rs. 799.00BloomCarry Floral Handheld Vase
Regular price Rs. 799.00Regular priceRs. 1,299.00Sale price Rs. 799.00Sale -
Dream Come True – Aesthetic Multipurpose Organizer
Regular price Rs. 999.00Regular priceRs. 1,999.00Sale price Rs. 999.00Dream Come True – Aesthetic Multipurpose Organizer
Regular price Rs. 999.00Regular priceRs. 1,999.00Sale price Rs. 999.00Dream Come True – Aesthetic Multipurpose Organizer
Regular price Rs. 999.00Regular priceRs. 1,999.00Sale price Rs. 999.00Sale -
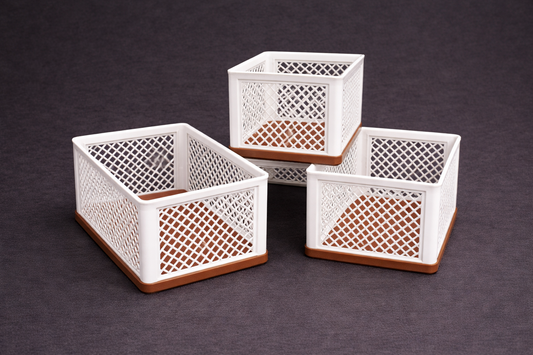
StackNest Square Storage Basket
Regular price Rs. 399.00Regular priceRs. 599.00Sale price Rs. 399.00StackNest Square Storage Basket
Regular price Rs. 399.00Regular priceRs. 599.00Sale price Rs. 399.00StackNest Square Storage Basket
Regular price Rs. 399.00Regular priceRs. 599.00Sale price Rs. 399.00Sale -
Mini Woven Storage Basket – Combo
Regular price Rs. 399.00Regular priceRs. 599.00Sale price Rs. 399.00Mini Woven Storage Basket – Combo
Regular price Rs. 399.00Regular priceRs. 599.00Sale price Rs. 399.00Mini Woven Storage Basket – Combo
Regular price Rs. 399.00Regular priceRs. 599.00Sale price Rs. 399.00Sale -
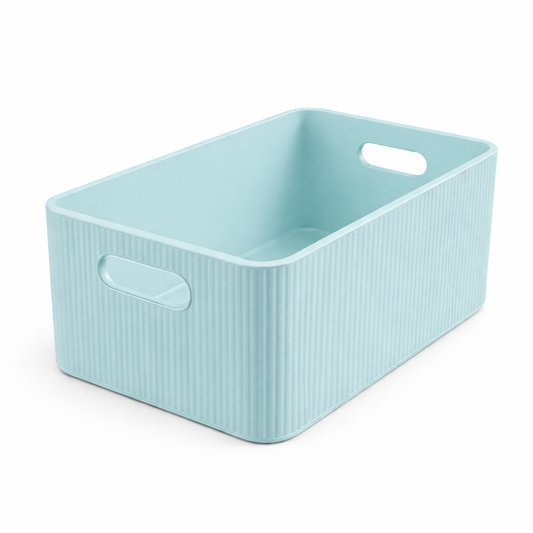
Ribbed Multi-Purpose Storage Organizer Basket
Regular price From Rs. 329.00Regular priceRibbed Multi-Purpose Storage Organizer Basket
Regular price From Rs. 329.00Regular priceRibbed Multi-Purpose Storage Organizer Basket
Regular price From Rs. 329.00Regular price


Popular Electronics & DIY
-
 Sold out
Raspberry Pi 4 Model B (4GB RAM)
Regular price Rs. 8,142.00Regular priceRs. 9,999.00Sale price Rs. 8,142.00Sold out -
4-Wheel Drive Smart Robot Car Chassis Kit
Regular price Rs. 674.00Regular priceRs. 999.00Sale price Rs. 674.00Sale -
28BYJ-48 5V Stepper Motor with ULN2003 Driver Board
Regular price Rs. 139.00Regular priceRs. 199.00Sale price Rs. 139.00Sale -
USB Type-B Cable for Arduino UNO, Printers & USB-B devices
Regular price Rs. 39.00Regular priceRs. 99.00Sale price Rs. 39.00Sale -
Raspberry Pi 4 Model B (1GB RAM)
Regular price Rs. 4,837.70Regular priceRs. 7,107.00Sale price Rs. 4,837.70Sale -
Arduino UNO Compatible Board (DIP ATmega328P)
Regular price Rs. 599.00Regular priceRs. 999.00Sale price Rs. 599.00Sale -
Arduino Nano Compatible – CH340 / ATmega328P (Unsoldered Pins)
Regular price Rs. 293.00Regular priceRs. 599.00Sale price Rs. 293.00Sale -
ACS712 30A Hall Effect Current Sensor Module
Regular price Rs. 129.00Regular priceRs. 199.00Sale price Rs. 129.00Sale


